How do you turn this pix....
into this...
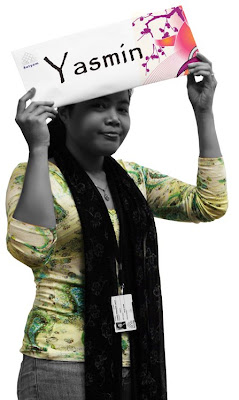
Hah! R u interested? :D RU? RU? lol ok just ignore that... Actually before I totally forgot how to do this, it's better that I make a tutorial... which can benefit us all.
What you need:
- Photoshop...duh =p
- The picture you wanna edit
- Another abstract, flowery or grunge design image (Whatever you like really)
- Creativity ^^
I'm not sure if this is the correct way to do this or not... as long as you got the output then it's alrite I guess. =p For this tutorial I'm gonna assume that you haf at least basic knowledge of Adobe Photoshop such as cropping, hue/saturation...bla bla ... and btw, I'm using PS CS3 Extended for this one.
This is where I'll start teaching ya bout how I edited em'... step-by-step. Just one request before we start though... please use you're own pix ok? :p dun go editing mine T_T... later I will feel very shy... mwauhaha
- First eliminate the background! The end product is something like this. Use Lasso Tool to accomplish that and enhance the pic at will until you're satisfy.
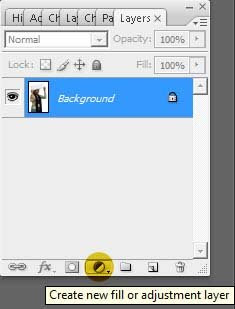
- Open your layer pallet (Window -> Layers). Click on the 'Create new fill or adjustment layer' and choose 'Black & White'
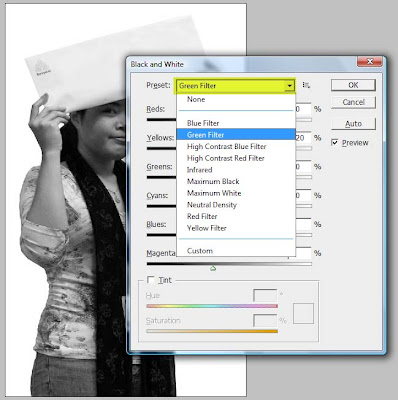
 Play with the Black & White layer's 'preset' until you're satisfy, for this tutorial I choose 'Green Filter'. Then press OK button.
- Select the 'Black & White layer' & pick up the 'Polygonal Lasso Tool' or 'Eraser Tool' and start eliminating the area where you don't want the black & white tone to appear.
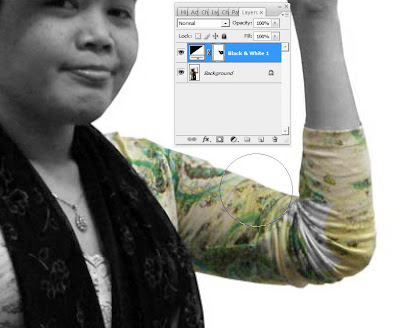
- This is what it'll look like when it's done (I've done cosmetic touch up to the skin... it looks perdy smooth right? lol Well for that I've used the 'Smudge Tool')

- Next open the flowery design image, copy it and paste (Ctrl+V) it on the image above so that it'll create another new layer on top of it (Name it flower or something, so that you won't be confused & use 'Move Tool' to move the new layer around).
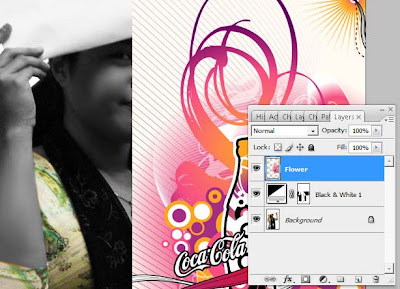
- You might wanna re-size or rotate the Flower layer a bit. To do this, make sure you've selected the Flower layer and go to Edit -> Transform & choose your preferred option.
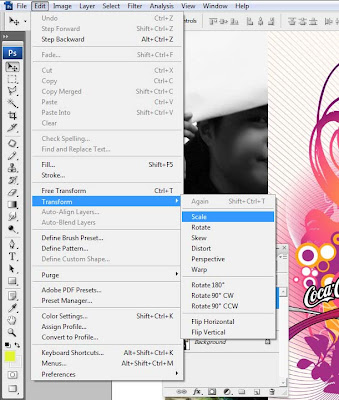
- In this case, I will first choose to scale it then rotate. After you're done scaling/rotating, just double click on the layer to end it. Then change the blend mode of the Flower layer to Multiply.
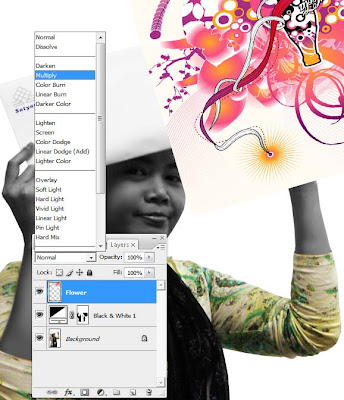
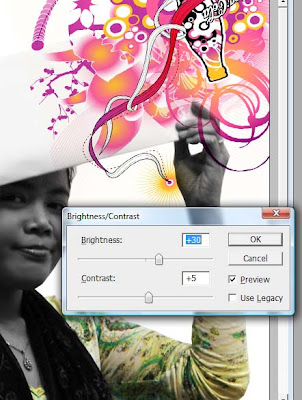
- This is the final result. Can you see the difference with the image above? It became a bit transparent. You can further enhance or play with the brightness of your Flower layer by going to Image -> Adjustments. Make sure your Flower layer is selected.
- Now while still selecting the Flower layer, we shall cut out all the excess design using 'Polygonal Lasso Tool'. Select the area and press delete. For more visibility, you can choose to disable the layer visibility of the Flower layer by clicking on the Eye, select the area you wanna delete, enable back the layer visibility and delete the layer.
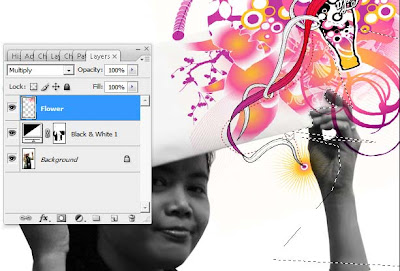
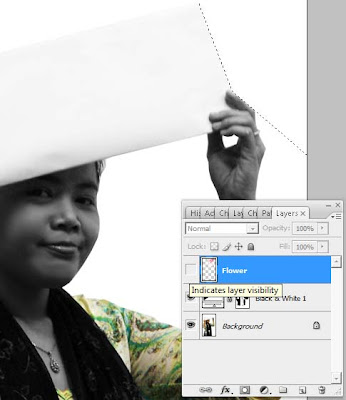
- Ok Done!

- Almost there! Now we're gonna create another layer for your name. Click on the 'Horizontal Type Tool' (As for the color of the font, I will leave it up to you. I'm using black for this tutorial), write your name and then select the 'Move Tool' to move it around and go to Edit -> Transform to rotate or scale them. Double click after you've done scaling/rotating. You're basically DONE! All you have to do now is go to Layer -> Flatten Image then save ur image lor. =D
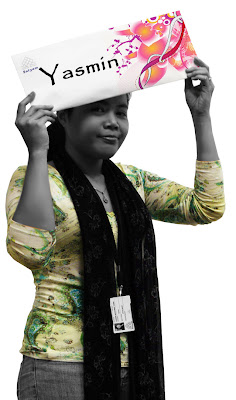
Some other examples based on this tutorial :D

This tutorial is roughly base on the "Selective Sephia" tutorial from Photoshop Tutorial website.


2 Angel Kisses:
hahaha...i was looking for the comment tag but watafa! angel kisses? XD how silly o me, had to go back to blogger school...duh!...
didn't know blogspot can do dat...
but the point is, i just started to mingle wit photoshop these few month, not really an IT or graphic person though but thanks for de post, donno whether i can do it but your blog r on my book mark oredi, i'll sure be back to 'tiru' the steps hahaha...
tq and wassalam...
!^_^
"support jambulism"
Salamz! hmm maybe coz i've changed the comment to angel kisses kot org tak ramai comment O_o haiyuu
Ape2 pun'... glad you find this post helpful/useful... (ke aku jek yg syok sendirik ni hehe =p). It's really simple, just give it a try ^^. I myself am still learning... any question you can ask me and I will try to assist ya.
Post a Comment